Enlarge Virtualbox Linux VM (vdi) LVM File System Size in Windows 10
Dr. George Jen
I run Virtualbox (version 5.2.26) on my Windows 10 notebook. Due to the restriction of disk capacity in the notebook computer, the size of VM disk is about 73GB, and is neally full (90%+ disk usage shown in df -k, the VM is CentOS 7). After I replaced the factory installed 256GB SSD to 512GB SSD in the notebook, and migrated original disk to new larger SSD, I have got some free space to enlarge the VM (the vdi file) to have more file system space to work with (for my use, I need to increase root file system space).
Following are the steps that I have done to resize the Virtualbox VM disk size to 130GB from 73GB.
0. Make a copy of the original VM file as backup. (this step 0 is a must and needlessly speaking, the VM needs to be down until step 4)
1. Run VBoxmanage command line to increase VM virtual size.
Open a command windows: (make sure you change directory to C:\Program Files\Oracle\VirtualBox and run VBoxmanage there, note the VM called CentOS71HadoopOnly.vdi is located in c:\ctu\vm folder)
Open a command windows: (make sure you change directory to C:\Program Files\Oracle\VirtualBox and run VBoxmanage there, note the VM called CentOS71HadoopOnly.vdi is located in c:\ctu\vm folder)
Following commands are to resize the VM disk total to 130GB (from 73GB)
cd C:\"Program Files"\Oracle\VirtualBox
VBoxmanage modifymedium disk C:\ctu\vm\CentOS71HadoopOnly.vdi --resize 130000
If successful, you will see below on the screen:
0%...10%...20%...30%...40%...50%...60%...70%...80%...90%...100%
2. Using gparted to create device with newly added space that made the size of VM disk to 130GB
a.. Download gparted ISO file (I choose amd64 iso) from below URL:
Save the iso file in the same folder where the VM file is located, in my case, in c:\ctu\vm\.
b. Start Virtualbox software, create a new VM called "gparted", choose not to create a disk, even with warning. Once created, click setup, then click storage,
delete the empty CDROM in the IDE sectionadd a CDROM, you will be able to provide the gparted iso file as the CDROM in the IDE section.add a disk in SATA section, the disk is the VM vdi file CentOS71HadoopOnly.vdi mentioned earlier that has been enlarged to 130GB virtual size by VBoxmanage
delete the empty CDROM in the IDE sectionadd a CDROM, you will be able to provide the gparted iso file as the CDROM in the IDE section.add a disk in SATA section, the disk is the VM vdi file CentOS71HadoopOnly.vdi mentioned earlier that has been enlarged to 130GB virtual size by VBoxmanage

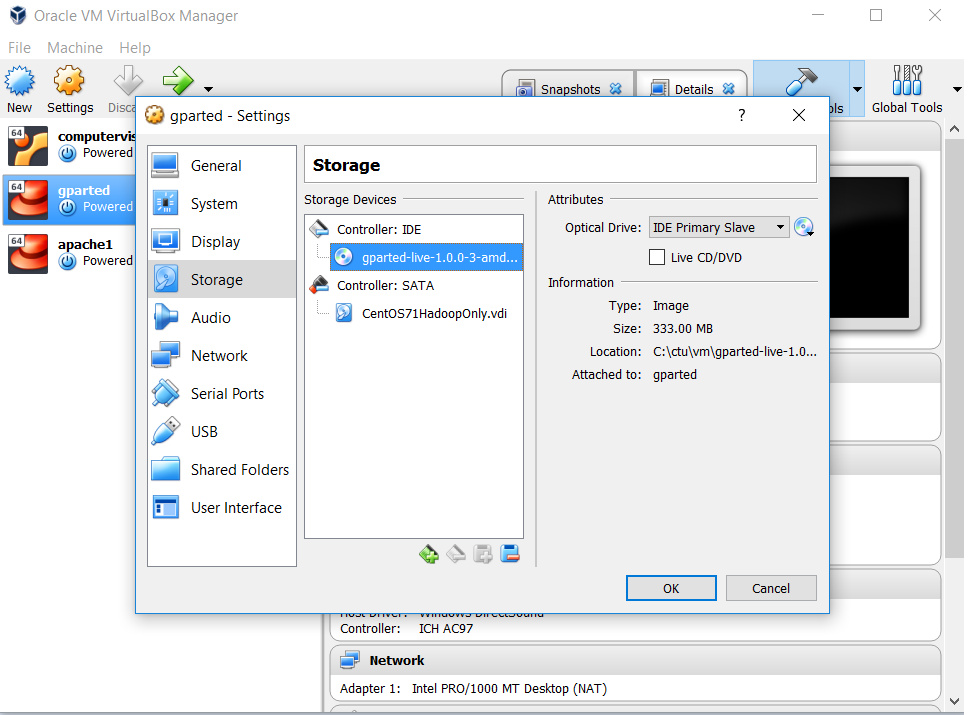
3. Start the garted VM which will boot from "CDROM" gparted-live-1.0.0-3-amd64.iso:

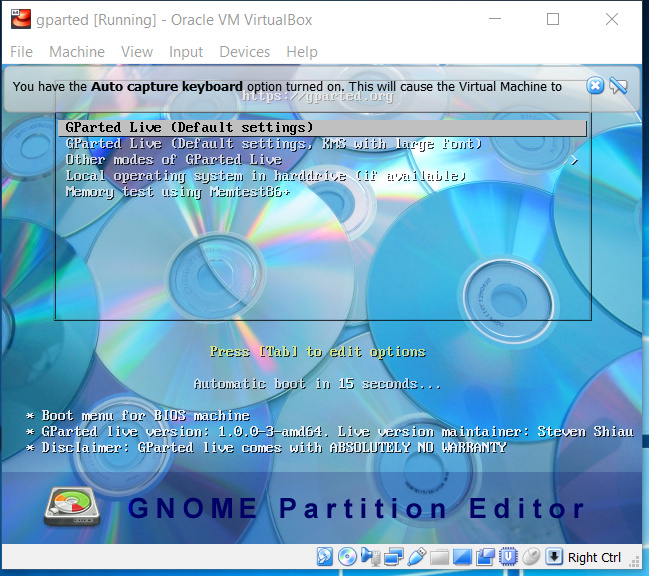
Just choose the first option: GParted Live (Default Settings) by pressing enter
You will be asked additional questions, just accept the default values by pressing enter keys. In the end, gparted GUI will show:

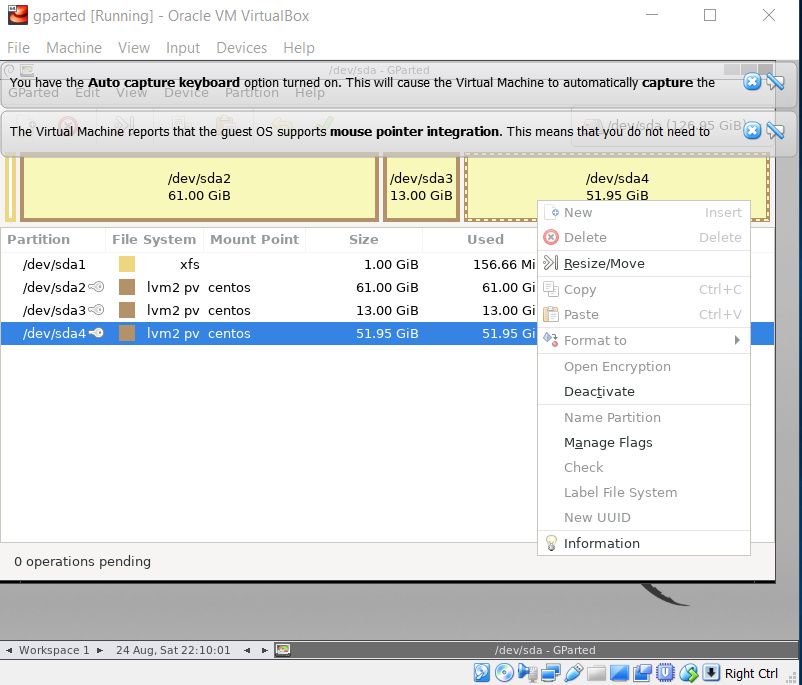
You will see free space showing up, right click the free space on the upper right corner, select New to create a new device. Choosing lv p2 and click Create button, then click Green check icon to apply the change. A new device will be created, in my case, the size of 51.95GB. Note, gparted will not show device which is /dev/sda4 (in my case, yours may be different). You need to shutdown VM gparted and restart it. Then it will show in the gparted GUI after gparted VM is up.

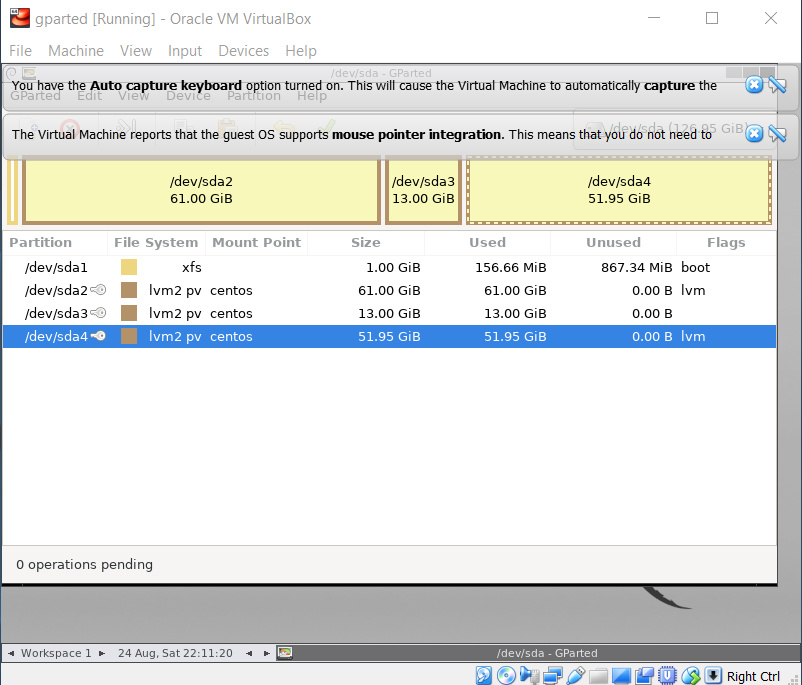
4. Shutdown VM gparted and start VM CentOS71HadoopOnly.vdi, once VM is up, ssh into it to to add new device /dev/sda4 into the volume group:
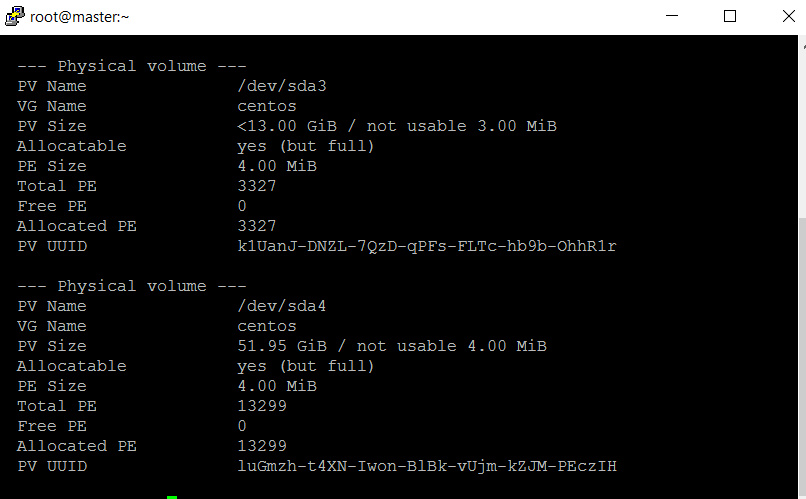
a. Run pvdisplay:
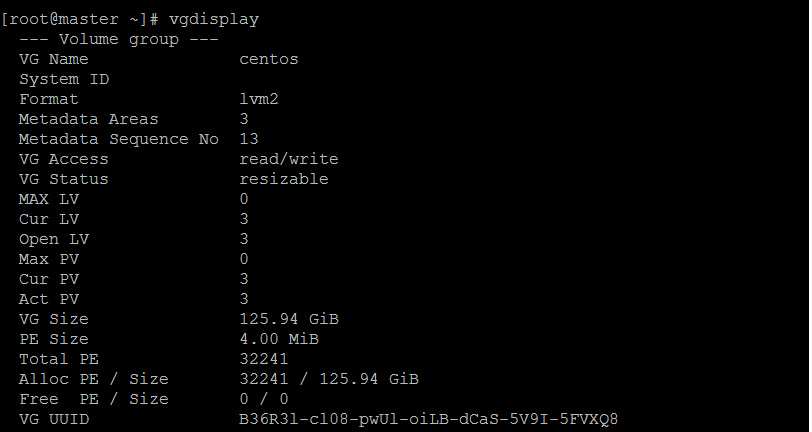
b. Run vgdisplay:
c. Run lvdisplay

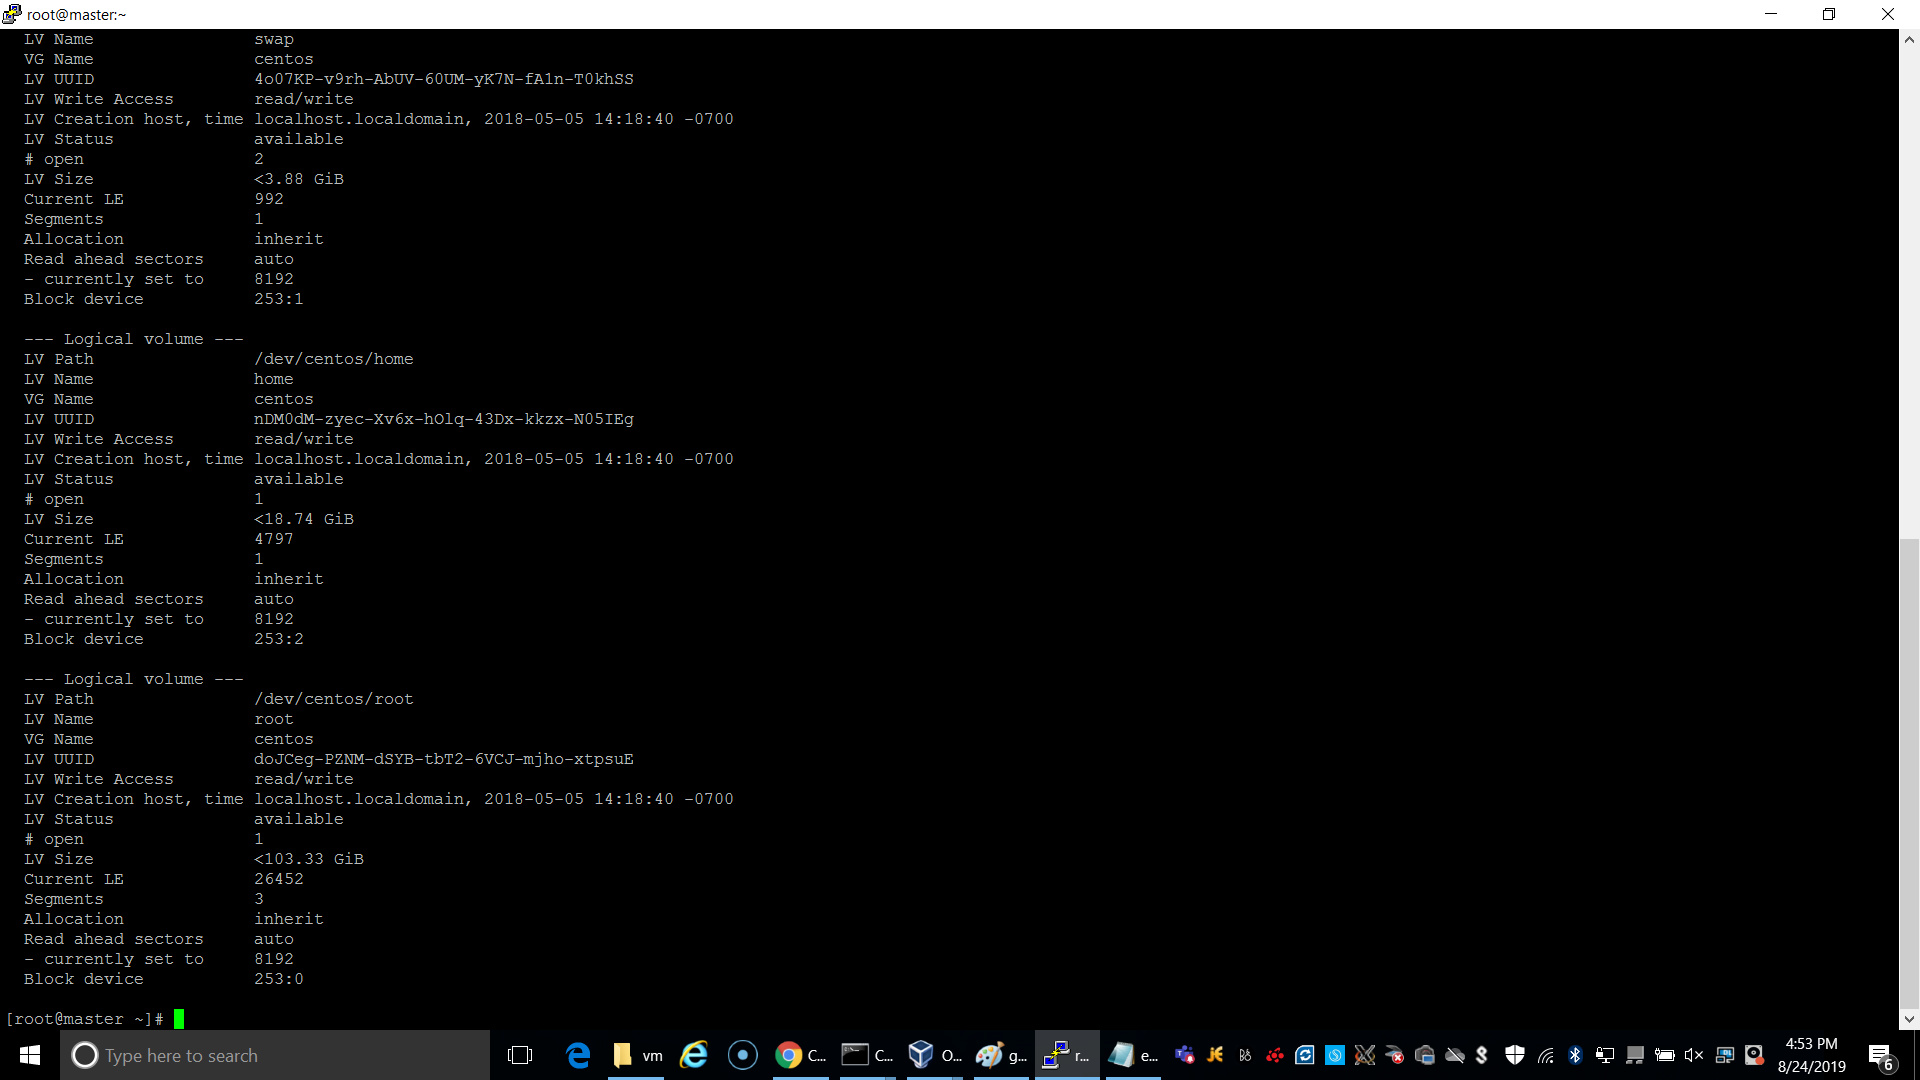
d. The purpose of running the above display commands are to take note of the following information to be used in the below steps:
LV path (mapped to the file system to be extended): /dev/centos/root
PV name (newly created device that has free space to be added to the file system): /dev/sda4
VG name (the volume group to be extended): centos
e. Run vgextend
vgextend centos /dev/sda4
f. Run lvextend
lvextend -l 100%VG /dev/centos/root
g. Run resize by command xfs_growfs
xfs_growfs /dev/centos/root
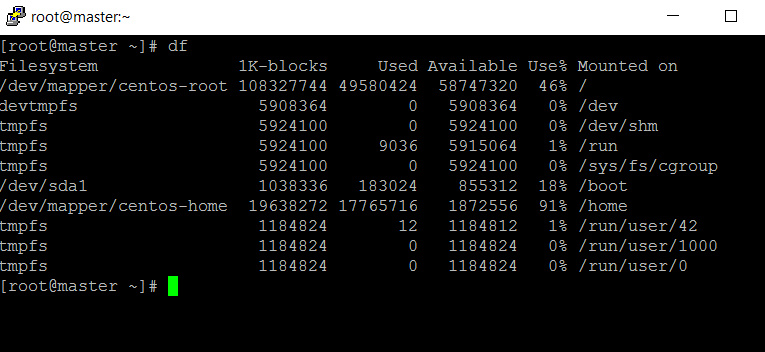
5. When all done, you will see added space by df command that shows increased capacity for file syetem / that is intended.
Hope this is helpful.
